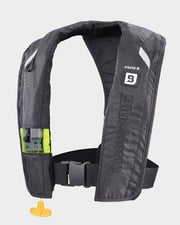
1. Why Use an Inflatable Life Jacket?
Most people are familiar with the concept of a life jacket, even if they don’t spend their summers on the lake or near other bodies of water. At the most basic level, these buoyant devices are there to help save lives in the event of an emergency on the water.
In a nutshell, finding the right life jacket comes down to who you are, what you’re doing on the water, and what you want to trust your life to when the going gets tough. Bluestorm inflatable life jackets and PFDs are made for the latter half of that statement — when the going gets tough.
As you’ll find out in the remainder of this page, inflatables are great for a variety of activities and come in many shapes and sizes. But one thing remains standard — inflatables are trusted by serious boaters, anglers, sailors, and paddlers. They’re for those who don’t fear the water but expect top-tier protection when they’re out there.
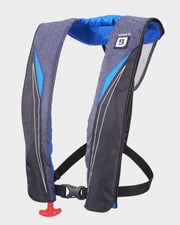
2. When To Wear an Inflatable Life Jacket
The short answer? Anytime you’re near or on the water and don’t intend on going in. An inflatable life jacket can save your life, but only if you wear it.
If you’re new to inflatable life jackets, check out the video below to get a basic understanding of how they work.
As you can see, inflatables do just what their name suggests — inflate. They’re meant to save lives which is why they expand within seconds when fully submerged in water. Think of them as your best friend in the event you go overboard. They’re the first ones to provide peace of mind and keep you afloat.
Generally speaking, the best times to wear an inflatable life jacket are when your adventures require mobility, take you offshore, in deep waters, or in unstable boating conditions like kayaking or paddleboarding. The following activities are great examples …
3. Choosing the Right Life Jacket
Deciding how to choose the right inflatable life jacket comes down to a few key factors: Coast Guard approval, buoyancy, and experience.
Coast Guard Approval
You should never waste your time and money purchasing an inflatable life jacket or PFD that isn’t backed by the U.S. Coast Guard’s seal of approval. There are two main reasons for this.
- For starters, the Coast Guard only approves life jackets that are actually capable of saving lives. In order to gain their stamp of approval, USCG standards require all inflatable life vests to undergo extensive testing to ensure they work when you need them most.
- Secondly, if you’re pulled over by the Coast Guard or a DNR warden and your life jacket isn’t up to USCG standards, you can face hefty tickets or fines that exceed the initial cost of a USCG-approved life jacket.
Buoyancy
The average adult needs 7 – 12lbs of inherent buoyancy to keep their head above water. When it comes to sizing, your weight is not the only factor when determining how much “extra lift” you need in water. It’s important to also consider body fat, lung size, clothing, and whether the water is rough or calm. Generally, the more physically fit you are, the more “lift” you need.
Experience
What you’re doing on the water should have an impact on your decision too. Whether it’s for fishing, paddling, sailing, or general recreation, the life jacket you choose should complement the level of mobility and protection you need. For example, you don’t need a military-grade PFD if you’re simply going out for a lap on the paddleboard.
If you’re looking to find the best life jacket for your experience, you’ve come to the right place. We offer several fool-proof resources to guarantee you have everything you’re looking for, including our new PFD Finder which matches you with the ideal life jacket based on your personal preferences.
Resources
4. Life Jacket Inflation Methods
Typically there are three main inflation methods for inflatable life jackets. Let’s take a closer look at how they work:
Automatic Inflation
The automatic method is as straightforward as it gets. If you’ve properly armed your inflatable, it will automatically inflate when fully submerged. The piece responsible for automatic inflation is the bobbin, which is water-soluble and dissolves when submerged. Once the bobbin dissolves, the triggering mechanism punctures the CO2 cylinder and inflates the bladder within seconds.
Frequently asked question — Will my inflatable life jacket unexpectedly inflate from rain or water spray?
No! Thanks to the intuitive design of the bobbin and inflator housing, your life jacket will not unexpectedly inflate from rain or water spray. It must be fully submerged for the bobbin to fully dissolve.
Manual Inflation
The manual inflation method is just as effective as the automatic method, but it requires the person wearing the life jacket to manually pull or jerk a handle located near the waistline on the left or right side (depending on the model). When the manual inflation cord is pulled, the inflator will override the dissolvable bobbin to inflate the life jacket within seconds.
Oral Inflation
The oral inflation method is used as a way to test for air leakage or as a backup in the event the CO2 cylinder fails. The oral inflation tube is located inside the cover on the wearer’s left or right side (depending on the model). To inflate your life jacket orally, access the inflation tube by opening the top portion of the cover, removing the dust cap, and blowing air into the tube until the bladder is firm. CO2 gas permeates the bladder more quickly than air, and therefore oral inflation can be used to refill the bladder in the event the wearer is in water for an extended time.
Keep in mind:
- Do not fully inflate the PFD orally and then again with the CO2 cylinder as it could damage the bladder.
- Do not attempt to orally deflate your inflatable life jacket immediately following CO2 inflation. Inhaling CO2 can lead to symptoms of drowsiness or headaches.
5. Donning and Fitting Your Inflatable Life Jacket
The great thing about inflatables is that they’re designed to be more comfortable and less restrictive than traditional foam life jackets. As we like to say, “more buoyancy, less bulk.” With that in mind, it’s important to wear a life jacket that fits properly, and finding the right fit comes down to a few key factors.
Chest Size
For adults, the biggest thing you’ll want to note is your chest circumference as opposed to your overall weight. To find your chest size, start by measuring the circumference of your chest at its broadest point. (Don’t worry, there’s no judgment here, so be sure to get an exact measurement.) You can use that number along with sizing or buying guides on our product pages to find the best fit for you.
Body Mass Index
While it’s not the most important aspect of sizing with regard to buoyancy, weight does hold some influence in determining the right inflatable life jacket, but not in the way you may think.
Your body mass index or BMI plays a role in sizing with regard to buoyancy. For example, people with a higher BMI will have a higher amount of body fat or muscle which increases their buoyancy in the water. Someone who is more slim and tall, however, will be less buoyant.
With that in mind, be sure to consider your weight as it relates to buoyancy. The average adult needs 7 – 12lbs of inherent buoyancy to keep their heads above water. Also consider body fat, lung size, clothing, and whether the water is rough or calm. Generally, the more physically fit you are, the more “lift” you need.
For your convenience, each Bluestorm inflatable life jacket is named to reflect the minimal amount of buoyancy achieved. The Atmos 40 can achieve a minimum of 40 lbs of buoyancy, the Stratus 35 can achieve 35 lbs of buoyancy, etc.
How To Properly Fit an Inflatable Life Jacket
- Loosen the belt side adjuster(s) and place your arms through the left and right sides of the vest.
- Secure the front buckle closure.
- Adjust by holding on to the side of the vest and pulling the waist adjustment belt to fit snugly.
- Secure the loose end of the waist belt in the black belt loop.
Important things to remember:
- Do not wear an inflatable PFD under any type of clothing. Always don the life jacket over your shirts, jackets, etc.
- If a life jacket is inflated before donning, release the air from the vest by using the oral inflation tube. Don, then re-inflate the vest by blowing into the oral tube until the bladder is tight.
6. Testing Your Inflatable Life Jacket
Testing your inflatable life jacket is one of the most important (and fun) things you should do before going out on the water. If you’ve never used one before, you’ll want to get a hang of how everything works. Likewise, the best way to check the buoyancy of your PFD is to confirm that it floats.
Reasons To Test Your Inflatable Life Jacket
- Make sure it floats you comfortably and adequately for water conditions and optimum performance.
- Make sure it works to confirm product integrity. It should inflate quickly and easily without leakage.
- Learn how it works by arming and activating the CO2 inflation system, re-arming, and using the oral inflator tube.
How To Test Using the Oral Inflation Tube
Testing your inflatable life jacket with the oral inflation tube is the most common way to test your vest and will not require any spare parts or re-arming kits. Orally inflating your vest is a great way to see how it inflates and floats you in the water without the need for replacement parts.
- Remove the CO2 cylinder to prevent inadvertent activation.
- Don the life jacket and enter shallow water deep enough to stand with your head above the surface. Weak swimmers should partially inflate the life jacket to support their ability to complete full inflation without touching the bottom. Note this level of inflation because it’s the minimum amount needed to safely use this device.
- Fully inflate the life jacket using the oral inflator.
- Attempt to float on your back or just slightly back of vertical. Your mouth should be above the water’s surface in a relaxed floating position. Note the effect of where you hold your arms and legs on how you float.
- Exit the water and deflate the life jacket using the oral inflator tube.
- Dry thoroughly, re-arm, and repack the life jacket.
How To Test Using the Automatic Inflator
When testing using the automatic inflator, you will need a fully-armed life jacket and a replacement re-arming kit approved for your specific model. This is the most accurate representation of how your inflatable will perform in an emergency.
- Don the life jacket and enter shallow water deep enough to stand with your head above the surface. The life jacket should automatically inflate within seconds of the inflator being submerged.
- Attempt to float on your back or just slightly back of vertical. Your mouth should be above the water’s surface in a relaxed floating position. Note the effect of where you hold your arms and legs on how you float.
- Exit the water and remove the used CO2 cylinder and bobbin from the inflator.
- Deflate the life jacket using the oral inflator tube.
- Dry thoroughly, re-arm with the replacement re-arming kit you have on hand, and repack the life jacket.
How To Test Using the Manual Inflator
When testing using the manual inflator, you will need a fully-armed life jacket and a replacement re-arming kit approved for your specific model.
- Don the life jacket and activate the inflation system by jerking firmly downward on the yellow manual pull cord.
- Enter shallow water deep enough to stand with your head above the surface.
- Attempt to float on your back or just slightly back of vertical. Your mouth should be above the water’s surface in a relaxed floating position. Note the effect of where you hold your arms and legs on how you float.
- Exit the water and remove the used CO2 cylinder.
- Deflate the life jacket using the oral inflator tube.
- Dry thoroughly, re-arm with the replacement re-arming kit you have on hand, and repack the life jacket.
How To Test Your Inflatable Life Jacket for Air Leaks
Your device may be inflated and submerged in water to check for leaks. If bubbles appear by the oral inflation valve, invert the black cap and tap the green spring. If bubbles continue to appear anywhere throughout the vest chamber, the device should be removed from service and replaced.
7. Re-arming Your Inflatable Life Jacket
In order to get the best use out of your inflatable life jacket, it’s crucial to maintain its safety abilities by understanding when and how to re-arm the hardware. The following steps are a general guide for re-arming your inflatable device, but you should always reference the instructions included in the user manual provided with your specific device.
If you would like to review the re-arming process specific to your device, download the owner's manual here or watch our re-arm instruction videos here.
When To Re-Arm the Hardware in an Inflatable Life Jacket
After your life jacket has inflated automatically while submerged in water, or after you’ve manually inflated it by pulling the cord, you’ll need to re-arm it before the next use. The best way to know if it’s time for a replacement re-arm kit is by checking the automatic service indicator, the bobbin, and the CO2 cartridge itself.
Checking the Automatic Service Indicator

Use the visual inspection window as the primary way to check the status of the automatic service indicator. If the indicator is green, the life jacket will automatically inflate within seconds after being submerged in water. If the indicator is red, your hardware is likely compromised and you’ll need to purchase a new re-arming kit.
A good way to remember this is by referencing the phrase, “Green means go, red means no!”
*Note that Bluestorm inflatables use two different inflation mechanisms: the Stratus 35, Arcus 40, and Atmos 40 all use the same 1F mechanism which has a visual seal indication window on the front shell. The Cirrus 26 and Cirro 26 use a 6F inflation mechanism that is located within the jacket. The inflation mechanics function in a similar manner, but the service indicators look different and are in different locations.
Checking the Bobbin

You’ll need to know how often to replace a CO2 cylinder or cartridge which can be found in the owner’s manual or noted on the device itself. Inspect the CO2 cylinder for any holes and confirm that it hasn’t expired. If there’s a small hole on the bottom this will indicate that it has been used.
How To Re-Arm the Hardware in an Inflatable Life Jacket
Now that you know the basics of when to replace the hardware in an inflatable life jacket, you can begin the process of re-arming it.
Step 1: Remove all air from the chamber
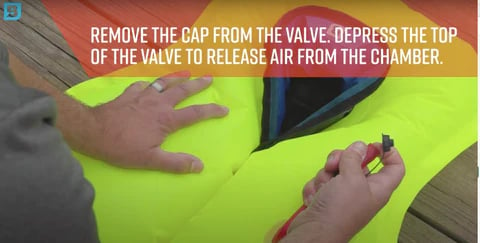
Locate the red oral inflation tube on the device where you would manually inflate it. Remove the black cap, invert it into the oral inflation tube, and hold it to release air. Squeeze or roll the inflated chamber until all of the air is expelled. Once the air has been expelled through the tube, replace the cap to its original position.
Step 2: Remove the cap and discard the old cylinder and bobbin
Locate the inflation mechanism that houses the bobbin and cylinder. On most of our vests, the inflation mechanism is easy to find and is located at the bottom of the inflation bladder on either the left or right side.
Remove the cap and discard the old cylinder and bobbin in the trash. Bobbins that have been exposed to high levels of humidity, heat, or vibration need to be inspected, removed, and replaced more frequently. Be sure to keep the original cap to re-install it after the process is finished.
Step 3: Get a new bobbin
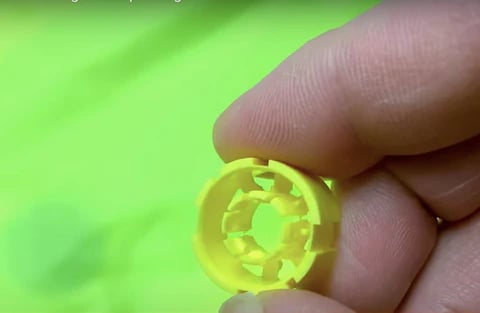
A good thing to remember is that the average shelf life for bobbins is three to five years depending on when you purchased your inflatable. That said, you should always inspect it between each use for cracks, breaks, or deteriorations that could prevent the life jacket from inflating. Purchase a new bobbin for your re-arm kit here.
*Note that Bluestorm inflatable life jackets purchased from 2019-2020 will require a replacement bobbin after three years. Models purchased from 2021 through today feature an upgraded bobbin that will last up to five years and is marked with an expiration date.
Step 4: Install a new bobbin and cap
After you have disposed of the old bobbin, install the new bobbin from the re-arming kit into the gray housing. Before installing, make sure the white material in the new bobbin is not cracked or damaged. Also, be sure to check the expiration date and ensure that the bobbin is not five years past its expiration. With the white facing up, drop the new bobbin into its housing after aligning it properly with the grooves.
Once the bobbin is dropped in the housing, re-install the cap and turn it clockwise until it meets the housing. There should be no gap between the housing and the cap.
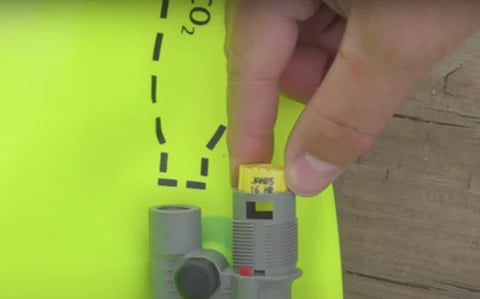
Step 5: Make sure the new cylinder has not been punctured
After the cap and bobbin are securely installed, take the new CO2 cylinder and ensure it’s not punctured or compromised.
Step 6: Install the new cylinder
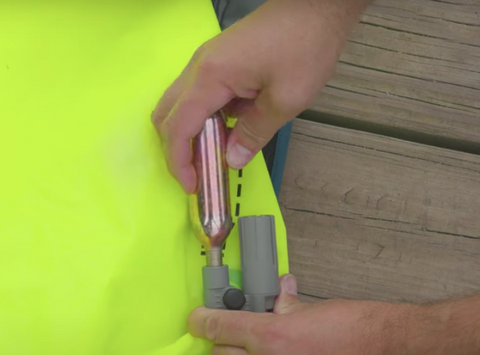
To install the new cylinder in its housing, turn it clockwise until snug, but do not overtighten If the cylinder is properly installed, the service indicator will show green.
*Note the Arcus 40 model will use a zipper enclosure.
Step 7: Re-pack the air chamber or bladder
Fold both sides of the air chamber into the outer shell. As you fold the air chamber, make sure not to twist it. To close the air chamber securely, press the hook and loop together on the outside edge of the shell. Once all of the bladder is in the shell, recheck that the green service indicator is shown through the indicator window on the shell.
8. How To Care for Your Inflatable Life Jacket
Despite having more bells and whistles than the average foam life jacket, inflatables are just as easy to care for.
Storage
You’ll want to store your inflatable life jacket in a well-ventilated area away from direct sunlight when you’re not using it. It’s best to avoid storing an inflatable in hot, cold, or damp places to avoid molding or CO2 corrosion. The gas in a CO2 cartridge expands in hot weather and contracts in cold weather which can affect the level of buoyancy in an emergency.
Cleaning
Cleaning your inflatable life jacket is simple, but be sure to consult your owner’s manual beforehand as some manufacturers have unique cleaning procedures depending on the material used. In most cases, you should always hand wash your PFD in clear water with non-toxic soap and hang it to dry. Avoid using harsh chemical or solvent-based cleaners with bleach or other toxins that could damage the material.
How to clean an inflatable life jacket
- Remove the CO2 cylinder and bobbin.
- Hand wash in warm soapy water using mild detergent.
- Rinse thoroughly with clean water.
- Hang dry in a well-ventilated area away from direct sunlight or heat sources.
- Ensure the life jacket is completely dry before re-arming, repacking, or stowing away.
Inspections
As a general rule of thumb, you should always check that your inflatable life jacket is in good and serviceable condition before every season or outing. Check that it’s free of rips, tears, or holes and that all seams are securely sewn. Likewise, ensure that the fabric, straps, and hardware still hold strong.
How to inspect an inflatable life jacket
- Remove the CO2 cylinder and bobbin.
- Visually inspect the device for abrasions, rips, tears, and punctures. Inspect the outer shell by “pinching” the fabric. It should not fray or tear. Life jackets with fabric that has faded, torn, or deteriorated should be removed from service and replaced.
- Perform a leakage test by orally inflating the chamber until firm. Let the device stand overnight to ensure enough time has passed to make a judgment. If a loss of air occurs, repeat the process to validate the result. If the leak persists, remove the life jacket from service and replace the device.
- Confirm the oral inflation valve is properly functioning by inflating the device and holding the valve underwater. If bubbles appear, repeat the process to validate the result. If a leak occurs, remove the life jacket from service and replace the device.
- Inspect the bobbin by looking for the white, water-soluble substance located within the bobbin. Check to make sure the white substance is still intact with no signs of cracks or breaks. Replace the bobbin if the manufacture date is over three years from the date of inspection.
- Inspect the CO2 cylinder for any holes or piercings near the face of the cylinder. Be sure to look for signs of rust or corrosion as well and replace if needed.
9. Make Your Next Life Jacket an Inflatable
Now that you know everything there is to know about inflatable life jackets, the next logical step is to buy one of your own. Bluestorm inflatables are some of the most innovative personal flotation devices on the market. Each model is hand-stitched and rigorously tested to ensure top-of-the-line quality and satisfaction. Plus, with performance materials like 3D mesh and memory foam backing, Bluestorm is the brand you’ll actually enjoy wearing.